

Installing of a minimOSD is a 1 hours task and requires following steps and preparation.
Needed components:
1. minimOSD (take it from here).
2. ImmersionRC video transmitter (take if from here)
3. Cable - flight controller to minimOSD
4. GoPro cable - from minimOSD to GoPro
5. ImmersionRC video transmitter cable - from minimOSD to GoPro (coming with the minimOSD and ImmersionRC).
6. M3 tape or similar
For even better results use the ImmersionRC SpiroNet - 5.8GHz CP antennas (you can buy it from here)
Installation process
1. Open the H500 - unscrew all the screws of the H500.
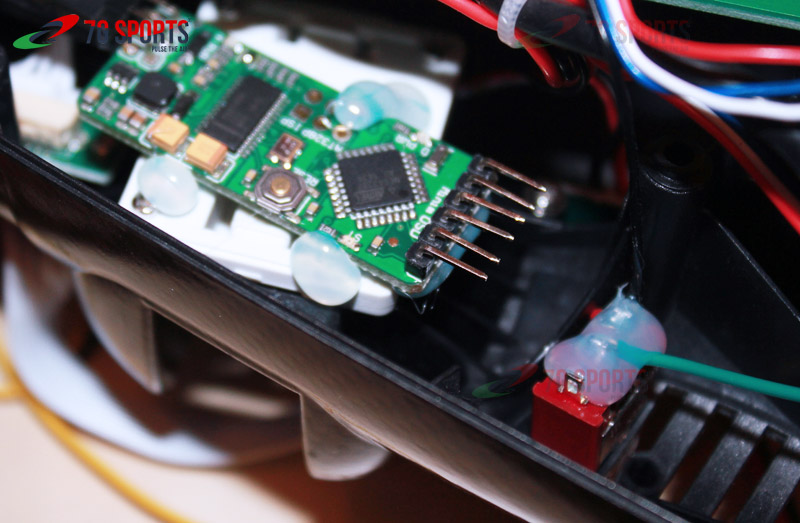
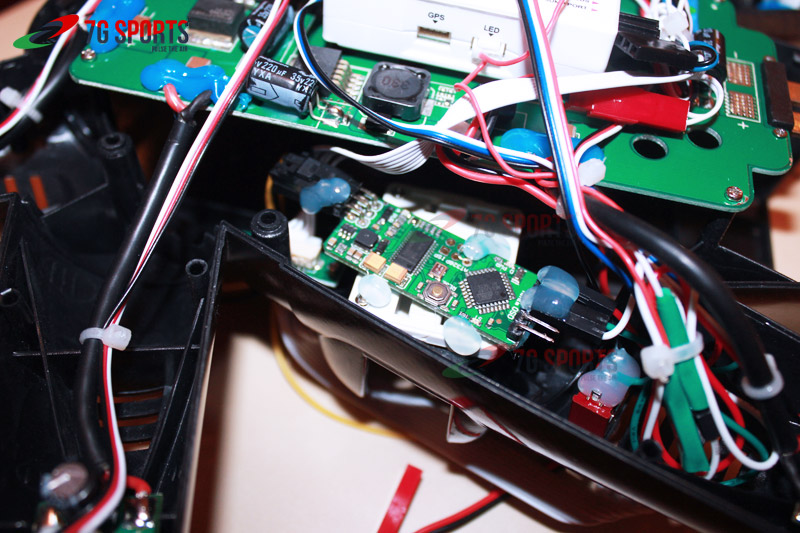
2. Fix the minimOSD inside the body of H500. We used the left side, just above the servo plastic parts. All fixations of the minimOSD are with hot glue on several spots + some glue on the bottom of the scheme. Use the direction of the scheme to point straight to the arm (this will allow you to make further updates of the minimOSD settings (via USB cable)).
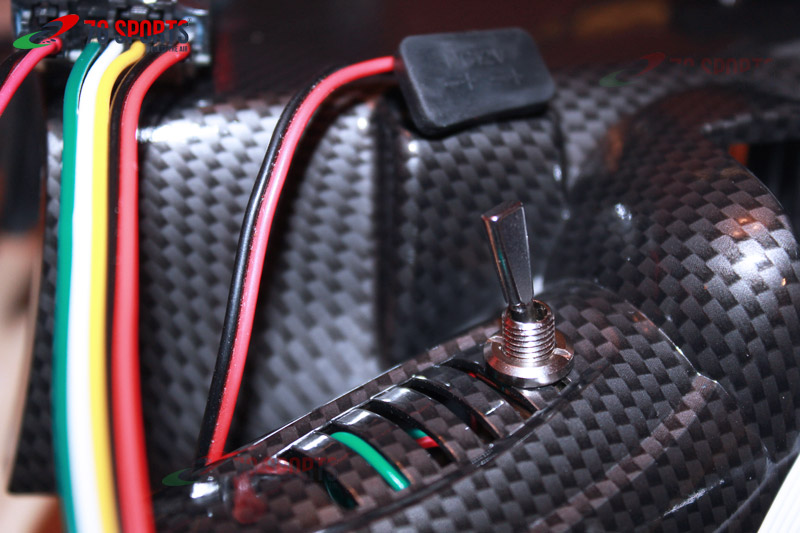
3. Make a small hole in the arm and install a 2 position switch.
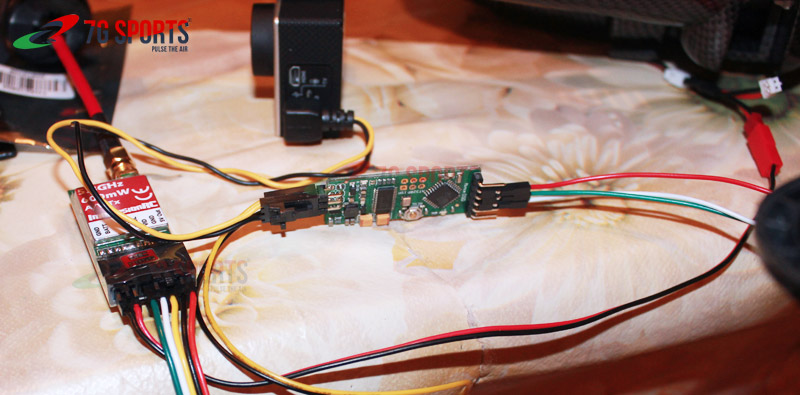
4. The connections as they are expected to be after having all installations and fixes done. GoPro cable is in front of us.
5. Connect the GoPro cable + the cable for the ImmersionRX video transmitter (the cable for the GoPro is the first one, under it is the cable for ImmersionRX VTx). Put the other ends of the cables outside using of the rigth body hole, the opposite on the left one where the receiver's antennas are). As the colors of the cables are the same it's a good idea to mark them outside so later you can easely connect each of them to GoPro camera and ImmersionRC transmitter.
6. You will need for a cable to connect the flight controller of H500 and the minimOSD (this cable could be made by yourself or you can buy the H500 signal cables where one of them could be used for this purpose. We used the one from the signal cables set).
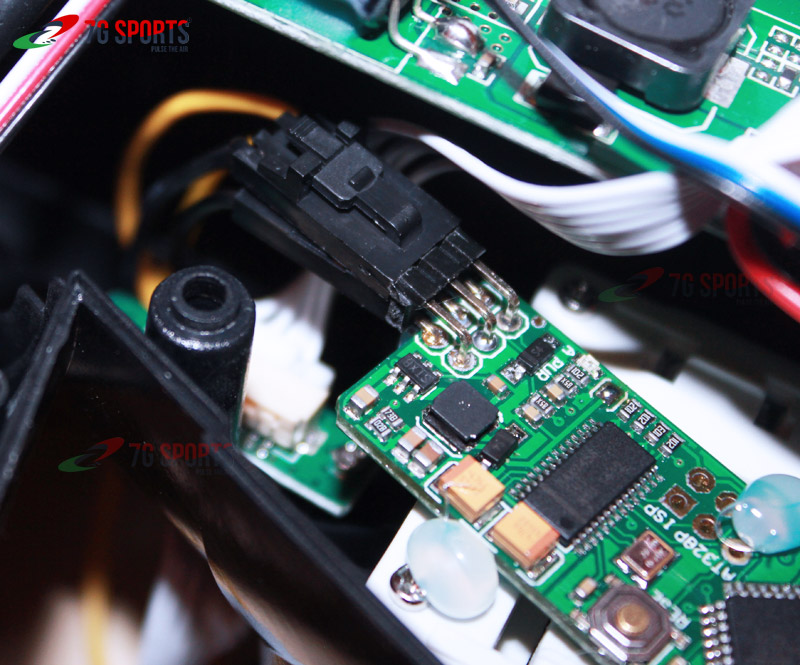
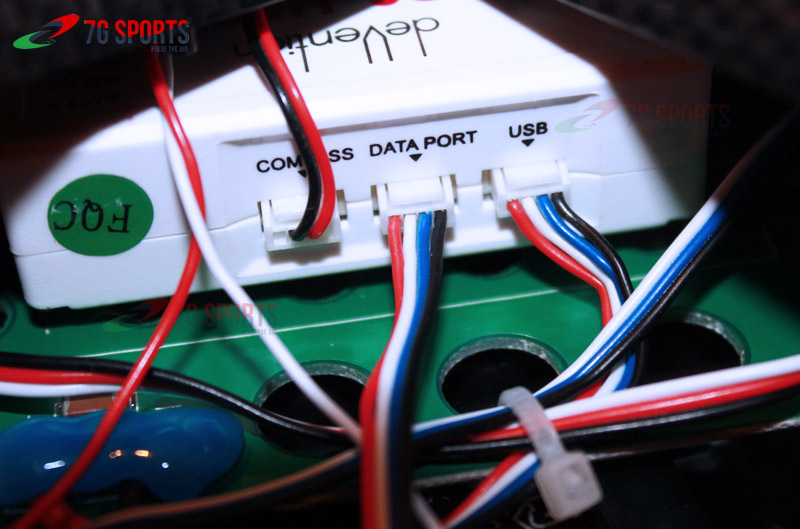
Connect one side of the cable to the Data port of the flight controller as it's shown on the image above.
The power button: we added a button allowing us to power up the minimOSD when we need it so it will not consume power if not used.
DATA PORT wires to minimOSD pins:
- red wire (ground) to BLK;
- white wire (the telemetry info) to RX;
- black wire (+5V) to our custom power switch, the green cable from the switch is entered in +5V pin of the minimOSD
7. Connect the cable's pins of the cable coming from the flight controller to the minimOSD in the shown order
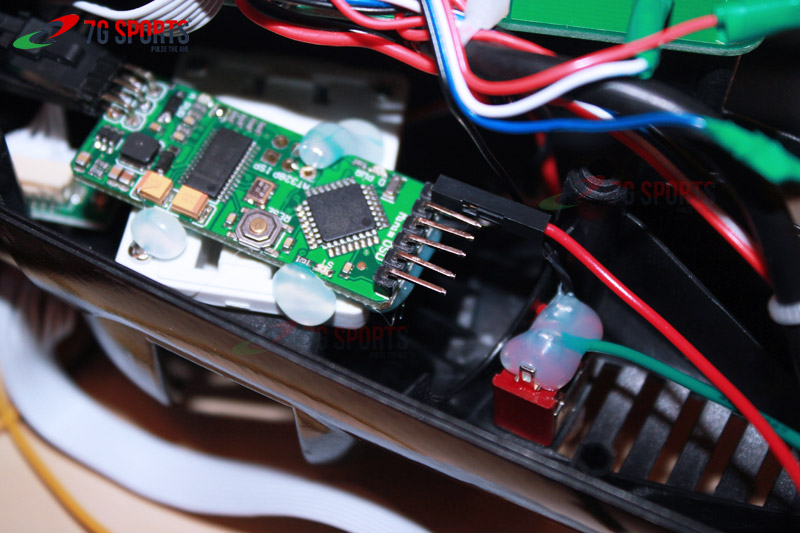
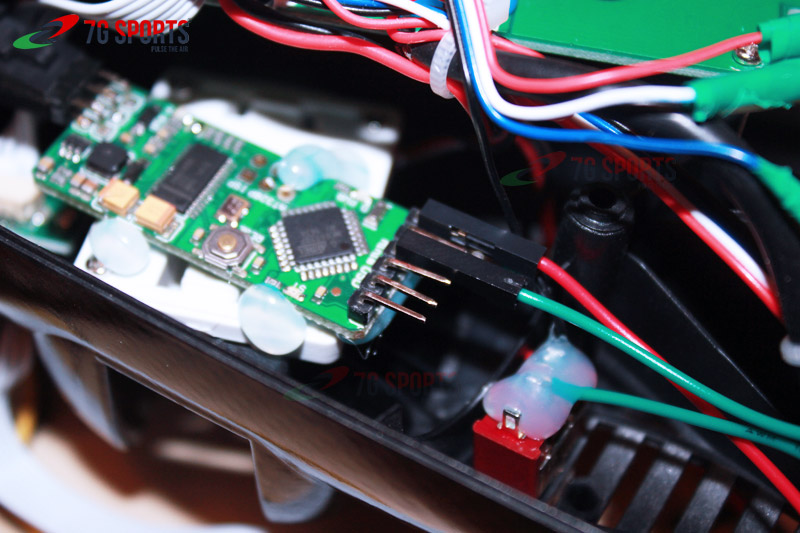
You should have the resulting connection from inside like this

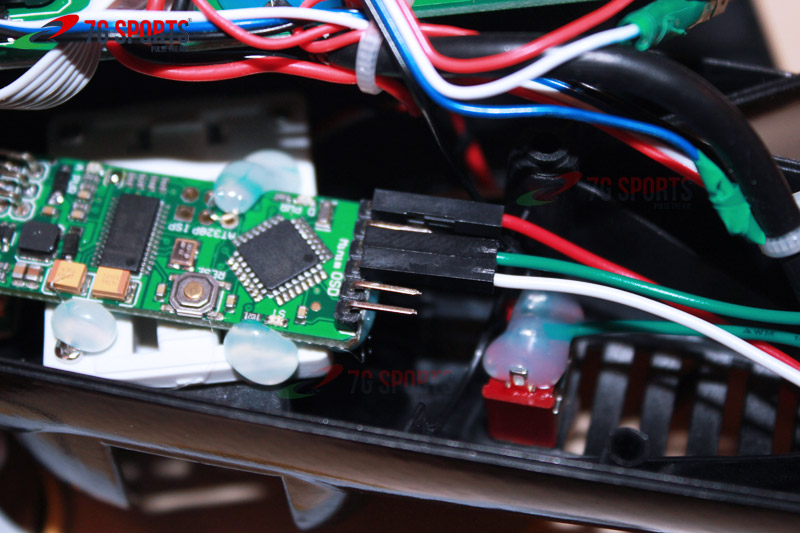
8. Hot clue on the minimOSD connections - just a prevention.
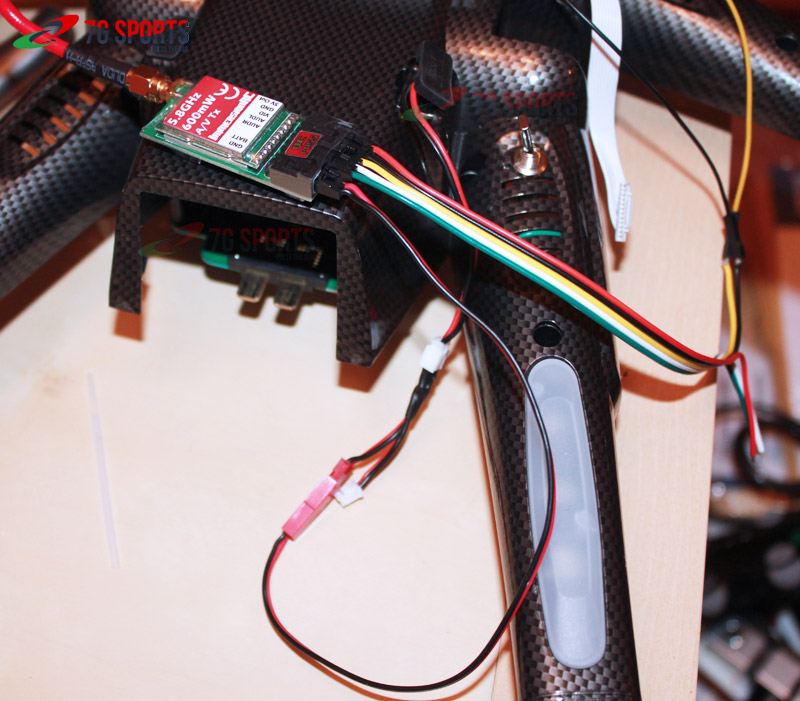
9. Installing of the ImmerionsRX video transmitter. We put it on the most back part (the power suppy is given from the H500 power plug), fixed with 3M tape. The yellow (VID - video input signal) and black (GND - ground) wires of the Immersion cable are connected to the respective yellow + black coming from the minimOSD.
Connect the GoPro cable to the camera (the cable we have does not supply power to the camera, it will be better if you buy/make an alternative one allowing powering of the GoPro camera).
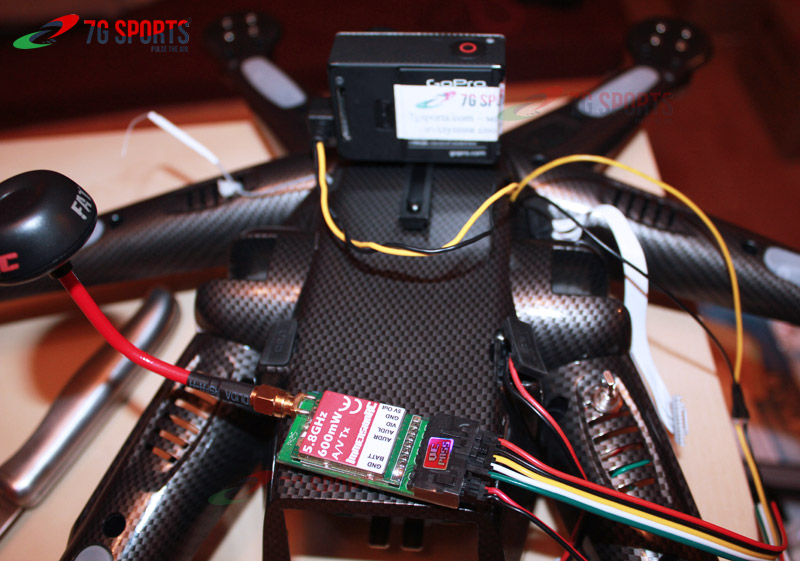
As you can see from the image above, the powering of the video transmitter is done by using the transmitter's power cable and the cable that comes with your H500 (usually with FPV versions, if you do not have such cable, please ask and we will send one to you).
10. Finally in action
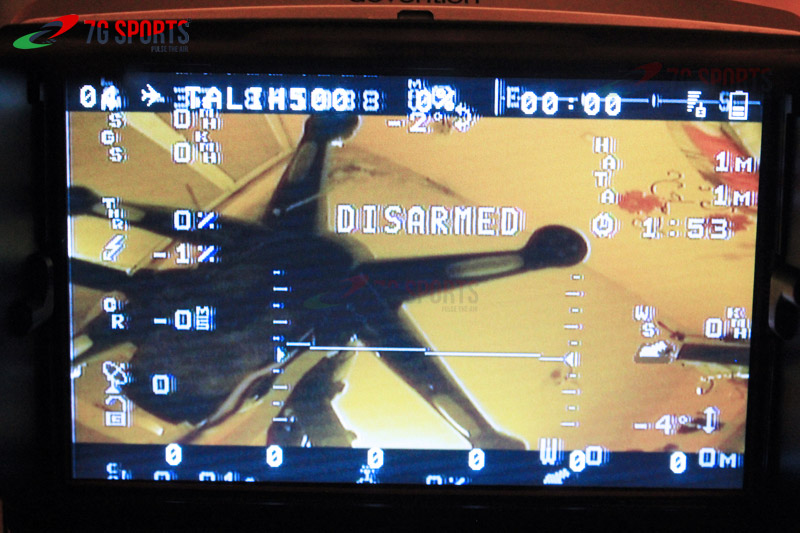
11. More? We need to make some adjustments of the minimOSD via its software to optimize the position the parameters on the screen (e.g. to reduce some of them).
A video with be available in some days showing of how the combined video + telemtry information is directly send to FatShark goggles.
Feel free to comment and to ask questions.
